VISUAL EFFECTS - DES711
CAPSTONE - JADEN INGRAM
PROJECT THEME
One theme that is expressed in my research question is realism. The purpose in this research is to gain a better understanding of the ideology around realism and what it really means from a VFX standpoint. Stephen Prince’s concept of perceptual realism "A perceptually realistic image is one which structurally corresponds to the viewer’s audiovisual experience of three-dimensional space" (Prince, 1996, p. 32). Perceptual realism is an image that does not necessarily have to portray something that physically exists in the real world to be perceived as realistic. Instead, realism can be created through the use of physical, spatial and visual cues that audiences recognize as believable. Perceptual realism will be a common concept within our project, following visual conventions like forced perspectives, atmospheric depth, reflections, CG environments, camera movements and lighting, particularly in our cockpit shots during the virtual production filming session where we will be using forced perspective to immerse our actor into a virtual cockpit. Other elements such as the spaceships, vfx and other environments are entirely CG, yet following the same visual conventions we can trick the human brain into believing what's real when it's not. This idea is also supported by Patruno (2017), who discusses perceptual realism specifically in relation to visual effects. Patruno highlights how CGI elements can appear realistic through similar visual characterisitcs. This demonstrates how realism in VFX can be created through the way digital elements are presented, rather than whether they physically exist.

Examples of forced perspective in film.


ExampleS of virtual production cockpit shotS
SHOT LIST
Getting back into Uni, Andrew and I finalized the production shot list. The shot list was an important part of pre-production because it helped organize every shot before filming. Its purpose was to make sure we understood what needed to be filmed, where it would be filmed, and what visual effects would be added later. For every shot, I included the shot type, camera angle, a thumbnail, a description of the action, the VFX work, the filming location, and notes on how we planned to film it. This allowed us to be fully prepared for each shot before arriving on set and helped keep the film cohesive visually. Whilst creating the shot list, we decided to use virtual production (VP) as one of our main filming resources. We decided to use VP for the many benefits it gives the user, such as cutting down a tight budget and decreasing the VFX workload, thus saving time. Swords and Willment (2024) explain how virtual production is changing filmmaking by allowing environments and VFX to be developed earlier in the production process, dampening the workload due to live visualization and eliminating green screen keying. FocusRat (2024) also explains how virtual production allows filmmakers to see and adjust the digital environment during filming, while green screen relies more on post-production. Giving the director the ability to change the CG scenery live on set providing greater creative control and a clearer vision of the final shot. This can also improve time efficiency, as traditional green screen workflows require directors to make decisions without seeing the final CG environment during filming which causes a lot of back and forth in the VFX pipeline. Because of the significant advantages of VP, we utilized it as much as possible. However, some shots were not achievable using VP and therefore required green screen. For example, shots where the floor was visible could not be filmed using VP, as the studio only provided walls. One challenge was gauging whether the planned VFX could actually be completed with the time and resources we had. To solve this, we reviewed each shot several times from the list we created. For example, our original plan was for the protagonist to get onto the ship wing after crashing into the water. Rather, we have him stay in the ship and look out with binoculars to cut down on some heavy visual effects work.
We then seperated shots into 3 catagories. 1. Green screen room 2. Virutal production room 3. Full CG shots. We did this in order to naviagte shots easier during filming in different areas. It adds clarity and allows us to know what work is required and what has not been done.
complete shot list

List of gear and props required for filming
weekly timeline
Similar style films such as Star Wars were researched as visual references for the overall project's theme, style and technical elements such as lighting and camera work. Star Wars was also used as a reference for the mothership sequence. Star Wars helped me conceptualize how environments can create a sense of scale, when developing the mothership's internal hangar sequence and creating a sense of scale within an enclosed environment. Within the mothership, we wanted the space to feel large-scale and intimidating. This was achieved through tall CG structures, large open areas and repeated environmental elements, such as the repeating corridor pattern, which gives the viewer a sense of depth. The industrial visual style of Star Wars was a great influence, particularly its use of large mechanical structures and layered details to make environments feel functional and lively. We aim to implement a similar concept of layering details into our cockpit shots to improve the detail of the internal walls of the ship, making the environment feel more realistic (Lucas, 1977). We found large CG models that suited an open space feel and used these to help build the hangar environment. We also found a corridor model and repeated its pattern to form the corridors, which is useful for creating depth in hallway shots. For the cockpit shots, I can create my own cockpit overlay in Photoshop that can be used across all cockpit shots. The overlay needs to be placed in an area where the character does not move in front of it, otherwise it will need to be rotoscoped. Star Wars was a good reference for developing the visual direction of the mothership and helped us think about how scale and detail could be communicated within the environments. This contributed to the overall visual style of Ansible and gave us a stronger direction for the internal ship sequences.
Environment Inspiration


Refrence images from starwars


3D model of mothership hangar
VP cockpit background
Corridor Layout for mothership sequence
We had booked out a session in the green screen room on Friday to obtain our live action plates and begin the VFX work. Due to our in-depth shot list, we were able to efficiently work through each shot, ensuring nothing was missed while gaining valuable experience filming and directing in a physical environment. To maintain accurate positioning, we used shoes and loose items as markers for our actor, indicating where to stop, walk, and turn. This allowed the actor to focus on performance rather than mitigating an environment that doesn’t exist. For the cockpit shots, we did not have a joystick, so we adapted by turning a guard baton upside down and had someone hold it from the bottom as a pivot/anchor point. Light bars were essential during filming as they allowed us to replicate the CG lighting planned for the environment. Rather than compositing light onto the character in post-production, we used practical lighting to achieve a more believable and photorealistic composite. This approach is supported by Debevec et al. (2002), who explored how lighting information from a real environment can be used to create more realistic integration between live-action subjects and digital environments. For example, the orange glow from the cockpit dashboard and red flashing lights were recreated using light bars, matching the CG environment and simplifying the compositing process in Nuke. Using practical lighting during filming allowed the lighting from the CG environment to be mimicked on the actor while capturing the live-action footage. This helped create a more believable and photorealistic composite while reducing the amount of lighting work required in post-production.
GREEN SCREEN FILMING


This week I began working on extracting the best takes from our green screen filming session and keying them out. The technical purpose of this process is to have all our clean shots keyed out and ready for compositing. This was an important technical stage because the quality of the key directly affected the final composite. A clean key was important to maintain the realism of the final shot. If green edges or spill remained around the actor, it could make the character appear separated from the CG environment rather than integrated into it. Zhi (2015) discusses the challenges of maintaining fine edge details when keying green-screen footage, which is relevant to our footage as we needed to preserve the edges of the actor to ensure a photorealistic finish whilst ensuring we keyed all the green. This influenced our decision to carefully refine the key rather than simply removing the green screen and accepting the initial result. I went through 5 different methods of keying in Nuke, from simple one node keying methods all the way to advanced keying systems. After trial and error, I figured out the most optimal nodes and systems for my footage and used them to my advantage. I used IBKColour in Nuke to generate a matte from the green screen. I used the IBKColour stacking method to generate a clean green screen adjusting erode, patch, darks and lights to get the green plate as clean as possible. Roto was also used where the key struggled with areas of the actor, areas where motion blur existed specifically. One challenge was maintaining clean edges while avoiding the removal of fine details. These methods I followed helped me to dampen these challenges I faced. The keying process created the foundation for the final composite. Producing a clean matte allowed the actor to be integrated with the CG environment without obvious green-screen edges or unwanted background elements. This contributed to the overall realism and made the later compositing stages more manageable.
GREEN SCREEN KEYING


Advanced keying method
Final method of keying - IBK colour stacking
screen shot showcasing all the different keying methods I attempted.

WATER SIMULATION PROGRESSION
I continued to chip away at the water simulation to ensure I was managing my time effectively. The purpose was to prepare the water environment early so the final composite could be completed efficiently. Developing the simulation ahead of time also allowed me to identify and solve technical issues. The main creative consideration was making sure the water simulation would suit the scale and movement of the ship. I was working towards getting the ship to interact with the water as a collision object and ensuring the splash behaves naturally, or as close as I can get it to real world water principles. I used ErikDoesVFX (2024) as a visual reference to gain an in-software understanding of how a similar water simulation could roughly look and behave in Houdini. SideFX (n.d.) highlights the importance of fluid object interactions when creating believable FLIP simulations, which supported my decision to focus on the ship's interaction with the water rather than treating the water as a separate element. Most decisions at this stage were technical rather than creative, as the focus was on getting the simulation to behave correctly and ensuring the parameters and settings were correct. In Houdini, I continued tweaking settings to achieve the desired water movement and surface behaviour. One issue I encountered during exporting my model, animation and camera into Houdini was that the collider needed a mesh to connect to, but there was no single mesh node for the ship after importing. I had to reconnect each object of the ship through a Merge node and copy it to another channel so I had one clean ship model as a mesh. Developing the water simulation early reduced the risk of it becoming a bigger issue later in production. It gave me more time to troubleshoot and refine the simulation before the final ship integration, contributing to a more organized workflow.


White water preview during trial and error
Single frame of ship interacting with FLIP sim
single frame mid splash of the FLIP sim
Single frame of white water cached


We had booked in a testing session in the virtual production (VP) studio this Thursday from 1-4pm. The purpose of this process was to not film the final shots, but to test out the feasibility of our VP shots we had planned contributing to the technical aspect of our project. During our session, we explored one of our highly complex VP shots and attempted that first. The shot consists of the actor sitting in a chair whilst on the VP screen shows the rear of a cockpit. With the right camera angle and focal length, we could mimic the shot as if our actor was really in the cockpit. I noticed two black boxes in the VP studio that sparked an idea. Physical props and environment assets can enhance the realism of VP by adding depth between the camera and the screen. The physical presence combined with the way that these props reflect light and add texture to the environment, help to blend the subject with the virtual environment better, contributing to a more immersive feel (MacKay, 2022). I utilized these two boxes as the internal walls of the cockpit. We lay them on either side of our actor, which also gave the actor something physical to work with. Framing up the shot, Top Gun: Maverick (2022) became a huge inspiration for us. Referencing a cockpit shot from an industry standard movie allowed us to better visualize our framing and layout for a more effective realistic shot. Overall, this test session was very much needed. It helped us to identify the problems and issues that would have come up on film day, and address them early on, helping ensure consistency and coherence across the project’s timeline.
VIRTUAL PRODUCTION TRIAL SESSION


WATER SIMULATION PROGRESS PT. 2 + VP trial session 2+3 (mid sem break + first week back)
Whilst the water sim looked like it was coming together I was only about 60% through. Andrew and I spent our 2 week holiday chipping away on our work to ensure we were making progress. We completed two more film testing shoots in the VP studio along with myself troubleshooting the water sim. The purpose of this element was to better prepare ourselves for the final stretch of the semester making our way through the technical contribution of the project. The VP tests focused on manipulating the perspective of the camera through camera angles, physical props and Post-image layering to to create the illusion of depth in a scene that is made up of an actor and a flat screen background. This principle draws on forced perspective and cinematic composition where framing and scale can infulence how the audience sees the composition and wheather it is precieved as realistic or not (WeVideo, 2024). Together, these techniques coutributed to seamlessly integrating live-action footage into a virtual world to repliacte a photorealistic shot.


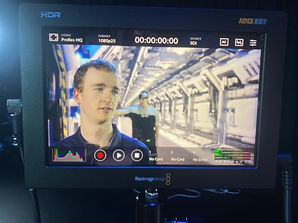

Working with camera angles, lighting and framing to get the perfect shot.


Learning the workflow of getting a flat water sim to work with an open ocean


First look at watersim render viewport in stage level
COMPOSITING
This week I worked towards compositing the green screen footage into unreal environments in Nuke, contributing to the techical aspect of this projcet. The aim of the comp stage is to seamlessly intergrate live action footage with cg environments. Applying techniques and skills I learnt, I was able to achieve a photorealistic composite. One technique I utilized in the comp stage was post rim lighting. Traditional green screen lighting suggests using a backlight to create a rim light around the subject to seperate them from the green screen (Pond5, 2019). However, the rim light created during filming was not intense enough for the CG environment, so I chose to enhance it during compositing to replicate the environment lighting better giving me greater control over its intensity, color and direction. This was done through a third party Nuke node called "rim-light". Another compositing technique I used was creating a post shadow beneath the actor onto the CG floor. Shadows can act as visual “glue” within a composite, helping to anchor elements within the environment and prevent them from appearing disconnected from the scene (Selan et al., 2003). In Nuke, a practical workflow for shadows is duplicating the keyed out actor, then warping and positioning the duplicate to resemble a shadow. This showed to be a challenge with a moving figure. Ultimately, I just created a rough mask and keyframe animated it along the sequence of the shot. This helped to seamlessly integrate the actor into his surrounding CG scene which contributes to creating a more photorealistic final film.


ANIMATING
At this point of the project, I had finished the water simulation and rendered it out ready to comp. Although for the amount of effort I had put into this shot, I felt the animation was short and the crash could have been more amplified with the intent of making it feel more realistic. Ultimately, I decided to re-do the water simulation with a new animation, contributing to the photorealism aspect of this project. To make a water crash sim look realistic, I did some research on real objects crashing into the water to gain a visual understanding and reference of how objects interact with real-world water physics. I again used ErikDoesVFX (2024) as a reference to recreate my animation. I decided to go back to Maya to animate as this was my original workflow that I found the most suitable for me, although it is also a common workflow for animated object simulations. During animation, I created a slight bounce when the ship first impacts the water. This was intended to represent the physical response of the ship hitting the water while still carrying a horizontal momentum. Research into water entry dynamics shows that when a body hits the water surface at a shallow angle and high speed, similar to my ship, the impact forces can cause the body to bounce off from the surface before entering the water (Park et al., 2003). Therefore, I included this concept into my animation, giving the ship a small bounce before plummeting into the water. I took the animation back into Houdini where I then had to re-cache and tweak settings such as the water sim bounds as the splash sim was over 50% larger, and smaller things like reanimating a new camera as well. This water sim adjustment contributes to making a more photorealistic water splash interaction which aligns with my research question 'how can simulation and virtual production pipeline be integrated to a live-action short film to achieve visual realism?'


Object bouncing off water reference
Erik does VFX reference of ship crashing into water. ErikDoesVFX (2024)

Having the bounce in the animation allowed for more whitewater particles and a more intense splash, making the ship feel more to scale compared to the previous animation, where it looked more like a toy in a bathtub.
Image showing the increase in whitewater particles overtime
SOUND DESIGN
Moving into the sound design of the project, I wanted to create an immserive experience for the audeice that would make them feel as if they were in our CG environments. I feel that sound is just as important as the visuals when trying to achieve realism within a projcet as it can influence the audiences mood and how they perceive whats happening on the screen. Rather then only focusing on the main sounds, I paid attention to the smaller sounds around the scene rather then what you were looking at, to help influence that immersion. For example I added a wind effect as the ships are flying through the moutnains to establish their speed and to make the camera feel as if it was actually there. Chion (1994) explains that sound and image are experienced together, with each influencing how the other is perceived. This highlights how sound can change the audiences perception of a visual scene, making it an important step to creating an immersive and realistic experience for the audience. I also looked at how timing, intensity and combination of sounds could influence the mood for each scene. For example as the ship thrusters lurch closer to the camera, I increased the decibel of the thruster to emulate real life as something gets closer it becomes louder. All the small details and techniques used in the sound design contributed to an overall succesful immersive sound experience, contributing to the realism of the project.


Timeline of audio clips utilizing sound layering and other techniques.
Refrences:
Prince, S. (1996). True lies: Perceptual realism, digital images, and film theory. Film Quarterly, 49(3), 27–37. https://doi.org/10.2307/1213468
Patruno, A. (2017, February 15). VFX and the perceptual realism of cinema. Luci Scribia. https://medium.com/luci-scribia/vfx-and-the-perceptual-realism-of-cinema-19dda845f0cc
Lucas, G. (Director). (1977). Star Wars [Film]. Lucasfilm; T
Swords, J., & Willment, N. (2024). The emergence of virtual production: A research agenda. Convergence: The International Journal of Research into New Media Technologies. https://doi.org/10.1177/13548565241253903
FocusRat. (2024, February 14). What is virtual production, and why is it better than green screen? https://focusrat.com/blogs/blog/what-is-virtual-production-and-why-is-it-better-than-green-screen?
OpenAI. (2026). ChatGPT (GPT-5.6 Luna) [Large language model]. https://chatgpt.com/
Debevec, P., Wenger, A., Tchou, C., Gardner, A., Waese, J., & Hawkins, T. (2002). A lighting reproduction approach to live-action compositing. ACM Transactions on Graphics, 21(3), 547–556. https://doi.org/10.1145/566654.566614
Zhi, J. (2015). An alternative green screen keying method for film visual effects. International Journal of Multimedia and Its Applications, 7(2), 1–12. https://doi.org/10.5121/ijma.2015.7201
SideFX. (n.d.). FLIP fluids. https://www.sidefx.com/docs/houdini/fluid/
SideFX. (n.d.). Fluid-object collisions. SideFX.
https://www.sidefx.com/docs/houdini/fluid/sopcollisions
ErikDoesVFX. (2024, October 17). I fixed the worst VFX shot of all time [Video]. YouTube. I Fixed The Worst VFX Shot of All Time
MacKay, A. (2022, December 14). Virtual production explained. CoPilot Co. https://www.copilotco.io/blog-posts/virtual-production-explained
Kosinski, J. (Director). (2022). Top Gun: Maverick [Film]. Paramount Pictures; Skydance Media; Jerry Bruckheimer Films.
Pond5. (2019, January 16). Working with green screens: Production and post-production techniques. Pond5 Blog
Selan, J., Finkelstein, A., & others. (2003). Merging live video. Cornell University.
Park, M.-S., Kwon, S.-H., & Chung, J.-Y. (2003). Numerical study of impact force and ricochet behavior of high speed water-entry bodies. Computers & Fluids, 32(7), 939–951. https://doi.org/10.1016/S0045-7930(02)00087-7
Chion, M. (1994). Audio-vision: Sound on screen (C. Gorbman, Ed. & Trans.). Columbia University Press.